
Roof Clamp & Hook Selection for PV Mounting
Different roof tile types require different clamps or hooks. Improper selection leads to leaks or module detachment under wind suction. Compare trapezoidal (self-tapping), standing seam (non-penetration), and glazed tile (adjustable hook) solutions with material and installation checks
RISK AUDIT // ENGINEERING DIAGNOSIS
Procurement Pitfall Guide
"Mismatched clamps on trapezoidal roofs are a leading cause of leaks and wind-driven panel loss."
QC-AUDIT // REV.5
SCALE 1:1 · 03 ITEMS
RISK-01
Diverse roof types lead to improper clamp selection
Corrective Measures
RISK-02
Aluminum alloy hook casting fractures under wind suction
Corrective Measures
RISK-03
Inadequate waterproofing at hook penetration points leads to leaks
Corrective Measures
FIELD-SPECIFIC INSIGHT
Clamp Selection Checkpoints for Wind and Leak Prevention
Roof clamp selection directly impacts wind uplift resistance and waterproof integrity. The key differences lie in penetration method, material grade, and sealing design. Use this table to verify your procurement specifications
WHAT TO CHECK
- 1Trapezoidal tile clamps use self-tapping screws that penetrate the roof; ensure EPDM gasket is compressed evenly to prevent leaks
- 2Standing seam clamps grip the seam without penetration; verify clamping force and rib width compatibility
- 3Glazed tile hooks require lifting tiles and fixing to base layer; check adjustable height range and waterproof gasket at penetration
- 4Aluminum alloy hooks may have internal porosity reducing strength; specify 6005-T5 or 304 SS for critical loads
- 5In coastal areas, clamp spacing must be reduced per local wind pressure requirements
| Check | Why it matters | What to specify |
|---|---|---|
| Roof type and clamp compatibility | Wrong clamp type causes leaks or insufficient wind resistance | Confirm roof tile profile and select matching clamp/hook |
| Material grade and corrosion resistance | Corrosion reduces clamp strength over design life | Aluminum 6005-T5 or 304 SS |
| Penetration method and sealing | Self-tapping screws compromise waterproofing; non-penetration clamps avoid leaks | For standing seam: non-penetration clamp with EPDM gasket; for others: sealant or gasket at all penetrations |
| Wind load and clamp spacing | Inadequate spacing leads to module detachment under wind suction | Clamp spacing per local wind pressure requirements |
| Bolt grade and torque | Under-torqued bolts loosen under vibration; over-torqued may strip threads | Stainless steel A2-70 bolts; torque per manufacturer spec; re-torque if below 80% of specified |
All clamp materials and coatings must be verified against project-specific environmental corrosivity category per ISO 12944-2
Evidence level: source-page-only
INDUSTRY TECH REFERENCE
The Clamping-Force Decay Chain: How Modules Fly Off in Year 3
Example: roof hooks and clamps tightened with M8–M10 stainless bolts. Daily roof temperature swings of 40–50°C are normal — and thermal cycling quietly drains preload.
- 1Roof surfaces swing 40–50°C daily (60–70°C daytime, 20°C at night); thermal cycling stretches and compresses the bolt repeatedly
- 2Preload decays 8–12% per year (magnitude estimate), so clamping force drops year after year
- 3By years 3–4, clamping force sits near 60% of the original — below design margin
- 4In strong wind the clamp slides along the tile rib or standing seam, and the module starts to shift
- 5Undersized clamping force meets typhoon season — the clamp slips out of control and the module flies off the roof
Contains magnitude estimates: 8–12% annual preload decay and ~60% remaining in years 3–4 (self-consistent with the KB cross-check); for selection reference only.
INDUSTRY TECH REFERENCE
Clamping-Force Defenses: Torque, Disc Springs, and Re-Check Cadence
Applies to: roof hooks and clamps with M8–M10 stainless bolts (A2-70 spec).
- Torque: M8 ≈15–18 N·m, M10 ≈25–30 N·m — overtightening cracks clay or slate tiles
- Disc-spring washers have roughly 5× the travel of ordinary spring washers (magnitude estimate), absorbing the daily thermal movement
- Every 2 years, spot-check 10% of clamp torques; if decay exceeds 20%, re-torque the whole batch
- Full check before typhoon season: look for slip marks, damaged washers, and cracked tiles
Disc-spring 5× travel is a magnitude estimate; the 10%-per-2-years sampling, >20% re-torque threshold, and pre-typhoon full check follow the KB recommendations.
INDUSTRY TECH REFERENCE
Why Rooftop Mounting Goes Non-Penetration First
The core rule of rooftop PV: someone else's roof is underneath — non-penetration comes first; where a penetration is unavoidable, waterproofing must be flawless.
The 15% bolthole-leak figure is an illustrative case (mechanism kept, project details untraceable).
PLAN COMPARISON
Three-Plan Core Parameter Comparison
Compare row by row. Click column headers to jump to plan details.
| A · ① Trapezoidal Color Steel Tile Clamp | B · ② Standing Seam Color Steel Tile Clamp | C · ③ Glazed Tile/Concrete Tile Hook | |
|---|---|---|---|
| 1. ANGLE CHI TYPE COLOR STEEL TILE CLAMP | |||
| SPEC | Adapts to pitch 210-250mm | Adapts to rib width 20-40mm | Adjustable height 50-100mm |
| MATERIAL | Aluminum Alloy 6005-T5 | 304 Stainless Steel | 304 Stainless Steel |
| FINISH | HDG >=55um per ISO 1461 | HDG >=55um per ISO 1461 | HDG >=55um per ISO 1461 |
| 2. TRAPEZOIDAL CLAMP | |||
| SPEC | Adapts to pitch 150-200mm | M8-M10 | Length 50mm |
| MATERIAL | Aluminum Alloy 6005-T5 | 304 Stainless Steel (A2-70) | 304 Stainless Steel |
| GRADE | — | A2-70 | — |
| FINISH | HDG >=55um per ISO 1461 | HDG >=55um per ISO 1461 | HDG >=55um per ISO 1461 |
| 3. CLAMP MATCHING BOLT | |||
| SPEC | M8-M12 | Adapts to C-channel rail | Adapts to M8-M10 bolts |
| MATERIAL | 304 Stainless Steel (A2-70) | 304 Stainless Steel | EPDM Rubber |
| GRADE | A2-70 | — | — |
| FINISH | HDG >=55um per ISO 1461 | HDG >=55um per ISO 1461 | HDG >=55um per ISO 1461 |
SELECTION GUIDE
Which trapezoidal clamp configuration fits your roof profile?
| Operating condition | Recommended option | Key basis |
|---|---|---|
| Trapezoidal color steel tile roof (wave height 30-50mm; Angle Chi 70-80mm) | Plan A: Trapezoidal/Angle Chi Clamp (pitch 210-250mm or 150-200mm) in 6005-T5 aluminum, A2-70 M8-M12 bolts, use with EPDM gasket | Bite the corrugation without penetrating the roof |
| Standing seam roof (rib height 65mm), high wind pressure areas | Plan B: Standing Seam Clamp (304 stainless steel, rib width 20-40mm), A2-70 locking bolts | Non-penetration bite type preserves the roof waterproof layer |
| Glazed tile / concrete tile roof (villa, rural residential) | Plan C: Adjustable Glazed Tile Hook (304 SS, height 50-100mm) with EPDM waterproof gasket | Lift the tile and fix the hook to the roof base layer |
| Coastal areas (wind pressure 0.5-0.9kN/m2, twice inland 0.3-0.45kN/m2) | Tighten clamp spacing from 1.2m to 0.6-0.8m; use stainless steel clamps and anti-loosening washers | GB 50009 wind load; 60% of typhoon detachments from wrong clamp selection/spacing |
| Aluminum alloy hook casting under wind suction | Choose T6 heat-treated A356 (>=260MPa) or machined extruded profiles; X-ray sampling, reject porosity >1%; safety factor >=2.5 | 0.55kN/m2 wind pressure loads a hook 0.8-1.2kN; porosity >2% cuts strength to 60-80% of theoretical |
① Trapezoidal Color Steel Tile Clamp
C3 (ISO 12944-2)
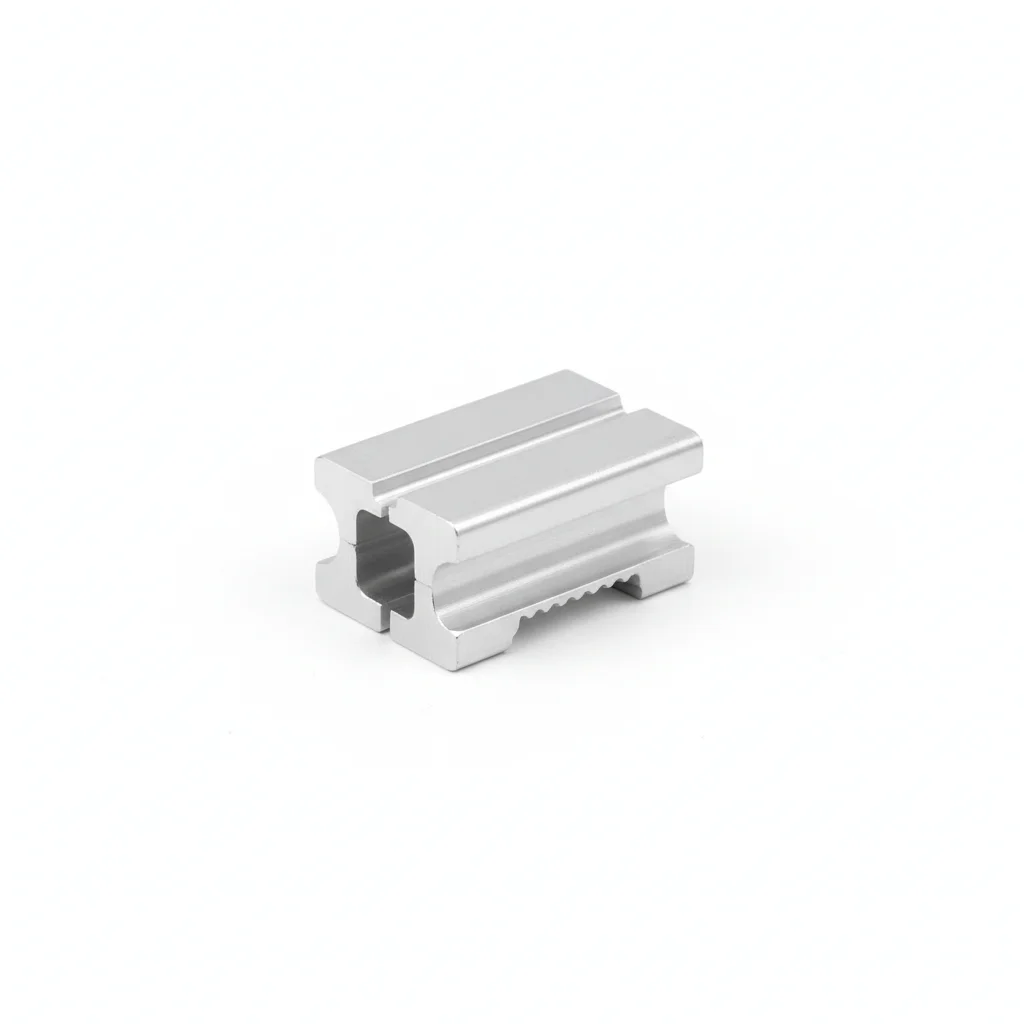
| Angle Chi Type Color Steel Tile Clamp | Trapezoidal Clamp | Clamp Matching Bolt | |
|---|---|---|---|
| SPEC | Adapts to pitch 210-250mm | Adapts to pitch 150-200mm | M8-M12 |
| MATERIAL | Aluminum Alloy 6005-T5 | Aluminum Alloy 6005-T5 | 304 Stainless Steel (A2-70) |
| GRADE | — | — | A2-70 |
| FINISH | HDG >=55um per ISO 1461 | HDG >=55um per ISO 1461 | HDG >=55um per ISO 1461 |
| CORROSION | C3 (ISO 12944-2) | C3 (ISO 12944-2) | C3 (ISO 12944-2) |
| TEMP | -20°C to +80°C | -20°C to +80°C | -20°C to +80°C |
| WEIGHT | ~0.5 kg/piece | ~0.5 kg/piece | ~0.5 kg/piece |
| MOQ | 100 pcs | 100 pcs | 100 pcs |
| PACK | VCI paper + carton | VCI paper + carton | VCI paper + carton |
| STD | ISO 898-1, GB/T 3098.1 | ISO 898-1, GB/T 3098.1 | ISO 898-1, GB/T 3098.1 |
| USE | Component fixing for trapezoidal color steel tile roof | Narrow pitch trapezoidal tile roof | Fastening clamp to rail connection |
PROCEDURE
- Measure the trapezoidal tile corrugation pitch and height to confirm the clamp model fits within the 210-250mm or 150-200mm range.
- Clean the tile surface and clamp contact areas to remove dirt and moisture; ensure the EPDM gasket is properly seated.
- Position the clamp over the corrugation peak, aligning the rail connector before inserting the M8-M12 bolt.
- Tighten the bolt to the manufacturer's specified torque using a calibrated wrench to avoid over-compression of the gasket.
- Perform a visual inspection of the gasket for even compression and check the clamp's grip on the corrugation.
COMMON ERRORS
| ✕ WRONG | CONSEQUENCE | ✓ CORRECT |
|---|---|---|
| Selecting a clamp without verifying the corrugation pitch and height | The clamp may not bite the corrugation properly, leading to reduced pull-out resistance and potential module detachment under wind suction. | Measure the tile profile and choose a clamp with the matching pitch range (e.g., 210-250mm or 150-200mm). |
| Overtightening the clamp bolt to compensate for an ill-fitting clamp | Excessive compression can deform the EPDM gasket, creating a leak path or damaging the tile coating. | Use a torque wrench and follow the specified torque for the M8-M12 bolt; if the clamp does not fit, replace it. |
| Skipping the EPDM gasket during installation | Without the gasket, the aluminum clamp can directly contact the steel tile, promoting galvanic corrosion and compromising the waterproof seal. | Always use the provided EPDM gasket and ensure it is centered under the clamp. |
MAINTENANCE
Inspect clamps at each seasonal change or after severe weather events, focusing on gasket integrity and bolt tightness. Re-torque any bolt that has loosened beyond acceptable limits. Replace clamps or gaskets showing signs of corrosion or deformation, per the 25-year design life.
② Standing Seam Color Steel Tile Clamp
C4 Harsh per ISO 12944-2
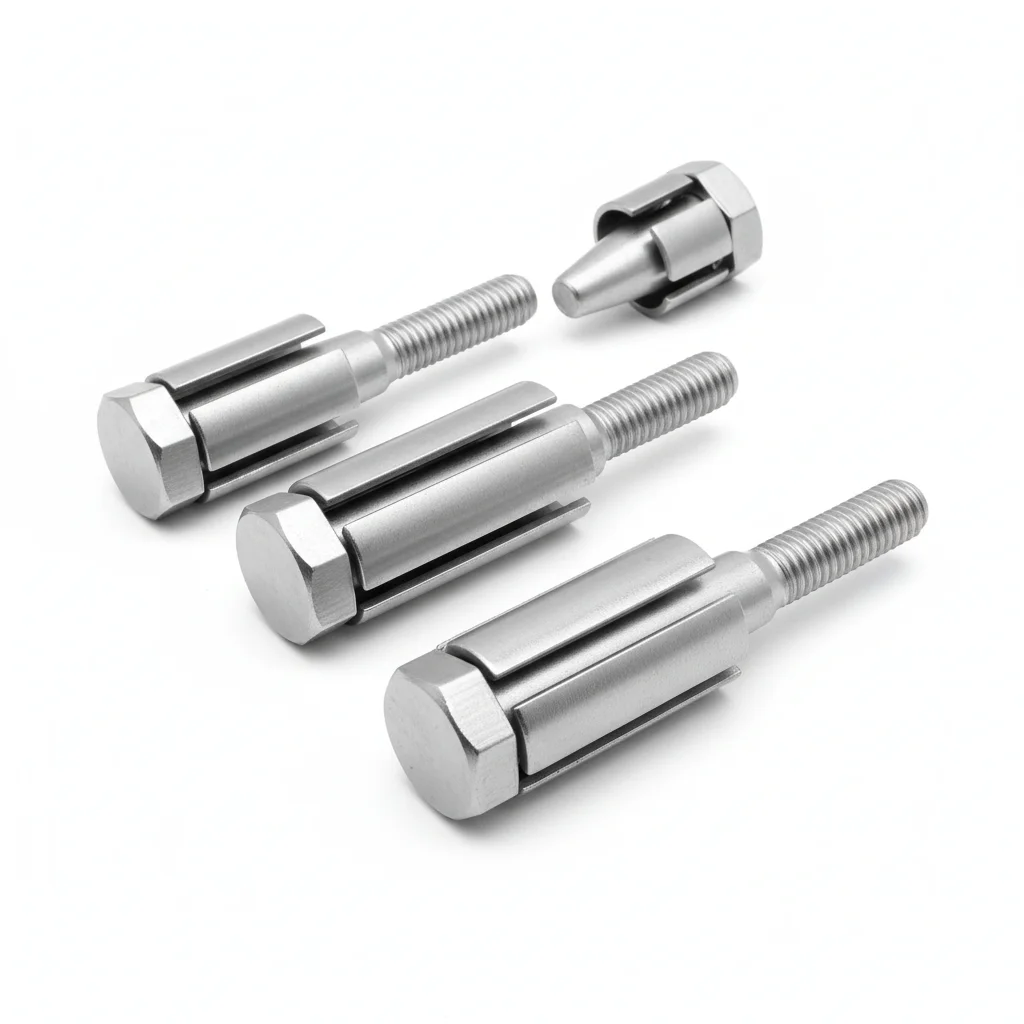
| Standing Seam Clamp | Locking Bolt | Rail Connector | |
|---|---|---|---|
| SPEC | Adapts to rib width 20-40mm | M8-M10 | Adapts to C-channel rail |
| MATERIAL | 304 Stainless Steel | 304 Stainless Steel (A2-70) | 304 Stainless Steel |
| GRADE | — | A2-70 | — |
| FINISH | HDG >=55um per ISO 1461 | HDG >=55um per ISO 1461 | HDG >=55um per ISO 1461 |
| CORROSION | C3 (ISO 12944-2) | C3 (ISO 12944-2) | C3 (ISO 12944-2) |
| TEMP | -20°C to +80°C | -20°C to +80°C | -20°C to +80°C |
| WEIGHT | ~0.5 kg/piece | ~0.5 kg/piece | ~0.5 kg/piece |
| MOQ | 100 pcs | 100 pcs | 100 pcs |
| PACK | VCI paper + carton | VCI paper + carton | VCI paper + carton |
| STD | ISO 898-1, GB/T 3098.1 | ISO 898-1, GB/T 3098.1 | ISO 898-1, GB/T 3098.1 |
| USE | Standing seam color steel tile roof | Clamp locking | Clamp to rail connection |
PROCEDURE
- Clean the standing seam rib with a dry cloth to remove any dust or oil, ensuring a dry surface for clamping.
- Position the Standing Seam Clamp over the rib (width 20-40mm) so the grip aligns with the seam profile.
- Insert the M8-M10 Locking Bolt and tighten by hand until snug, then torque to the manufacturer's specified value using a calibrated wrench.
- Verify the clamp is firmly seated and does not slide along the seam; check that the EPDM gasket is evenly compressed.
- Attach the Rail Connector to the C-channel rail and secure the module mounting rail, ensuring all connections are tight.
- Inspect the entire assembly for any gaps or misalignment, and confirm that no roof penetration has occurred.
COMMON ERRORS
| ✕ WRONG | CONSEQUENCE | ✓ CORRECT |
|---|---|---|
| Selecting a clamp with incorrect rib width range for the standing seam profile | Clamp cannot grip the seam properly, leading to reduced pull-out resistance and potential module detachment under wind uplift. | Measure the actual rib width on site and choose a Standing Seam Clamp that matches the 20-40mm range; if out of range, consult the supplier for a custom solution. |
| Over-tightening the locking bolt beyond the specified torque | May deform the seam or strip the bolt threads, compromising the clamp's holding force and creating a leak path. | Use a calibrated torque wrench and follow the manufacturer's recommended torque value; avoid exceeding it. |
MAINTENANCE
Inspect clamps and bolts for corrosion or loosening at each seasonal maintenance check, especially after storms. Re-torque any bolt that has lost more than 20% of specified torque. Replace any clamp or bolt showing corrosion pitting deeper than 0.3mm or affecting more than 5% of surface area.
③ Glazed Tile/Concrete Tile Hook
C5-M Extreme per ISO 12944-2
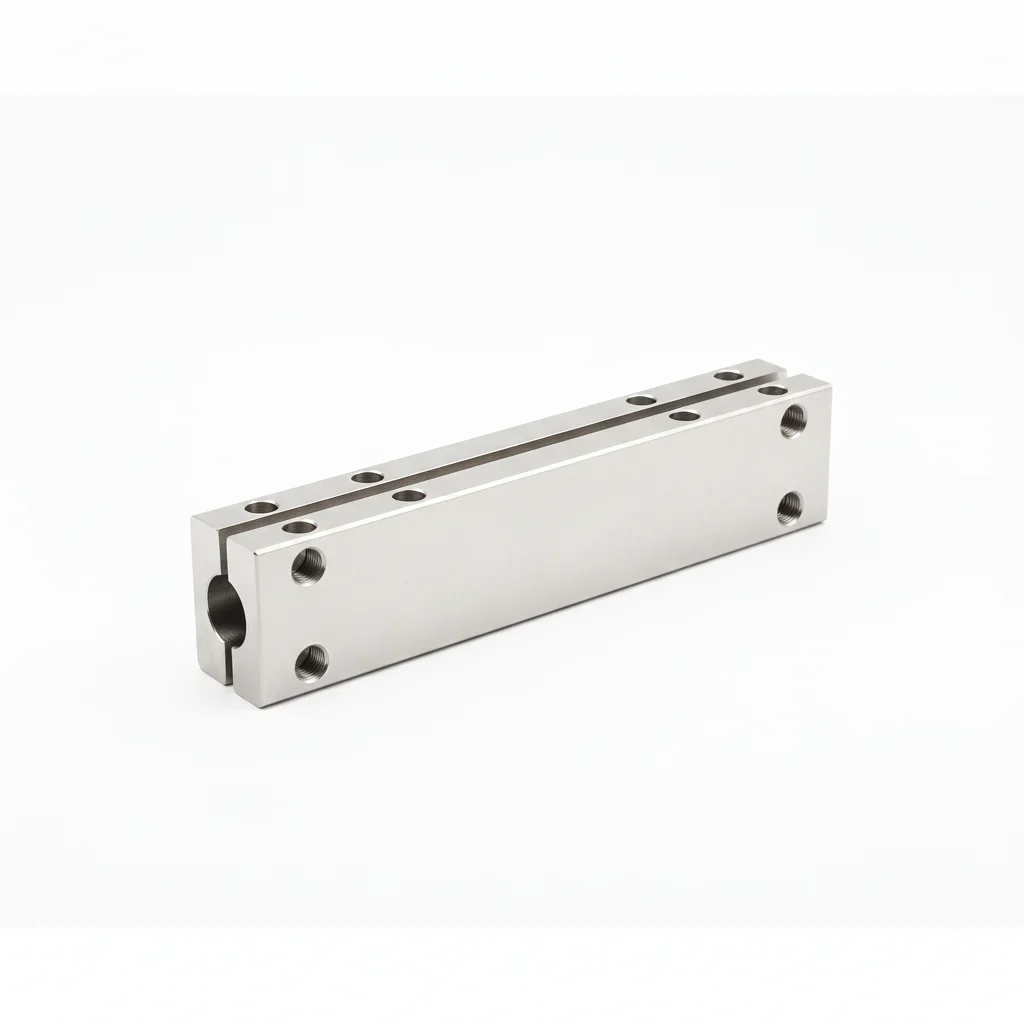
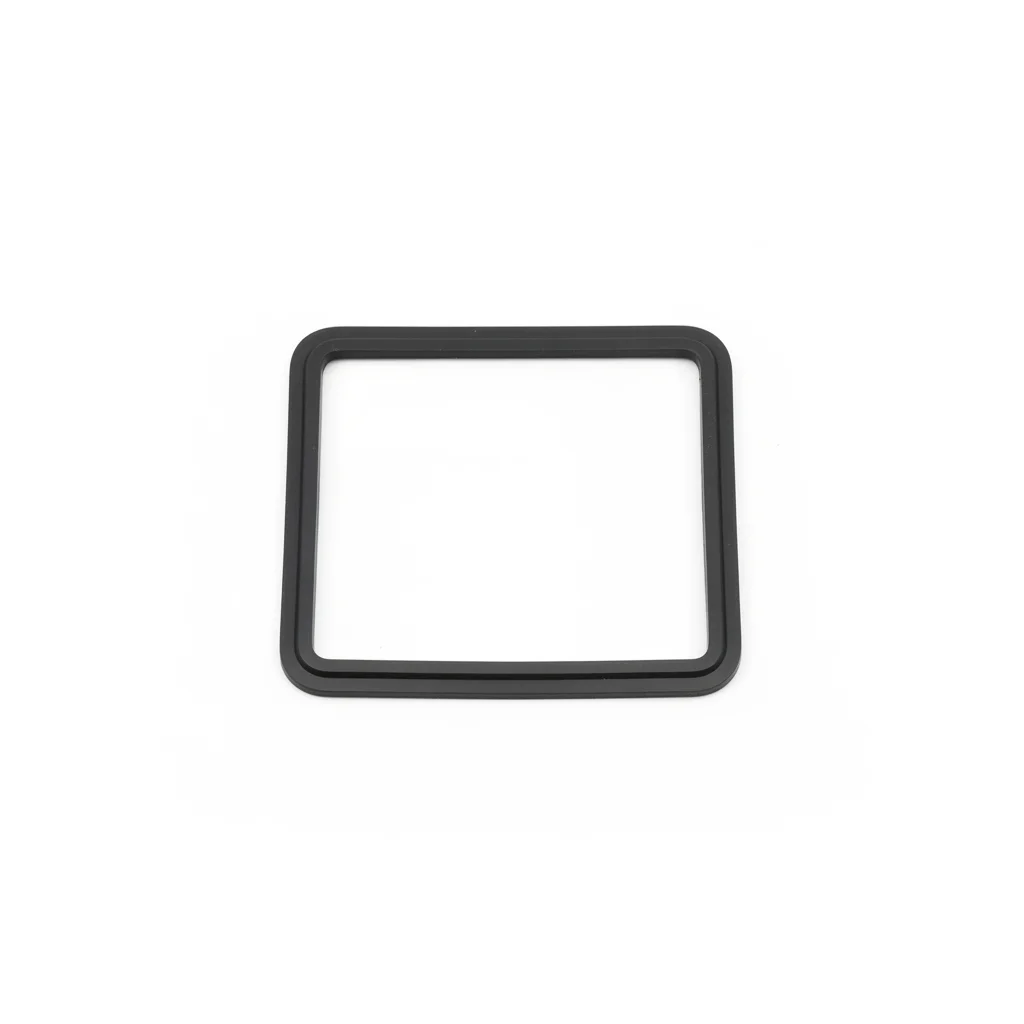
| Glazed Tile Hook (Adjustable) | Clamping Block | Waterproof Gasket | |
|---|---|---|---|
| SPEC | Adjustable height 50-100mm | Length 50mm | Adapts to M8-M10 bolts |
| MATERIAL | 304 Stainless Steel | 304 Stainless Steel | EPDM Rubber |
| GRADE | — | — | — |
| FINISH | HDG >=55um per ISO 1461 | HDG >=55um per ISO 1461 | HDG >=55um per ISO 1461 |
| CORROSION | C3 (ISO 12944-2) | C3 (ISO 12944-2) | Not applicable (polymer) |
| TEMP | -20°C to +80°C | -20°C to +80°C | -20°C to +80°C |
| WEIGHT | ~0.5 kg/piece | ~0.5 kg/piece | ~0.5 kg/piece |
| MOQ | 100 pcs | 100 pcs | 100 pcs |
| PACK | VCI paper + carton | VCI paper + carton | VCI paper + carton |
| STD | ISO 898-1, GB/T 3098.1 | ISO 898-1, GB/T 3098.1 | ISO 898-1, GB/T 3098.1 |
| USE | Glazed tile/Concrete tile roof | Component fixing | Waterproofing at hook penetration point |
PROCEDURE
- Lift the glazed or concrete tile carefully and locate the roof base layer where the hook will be anchored.
- Adjust the Glazed Tile Hook to the required height (50-100mm) and fix it to the base layer using appropriate stainless steel fasteners.
- Place the Waterproof Gasket over the hook penetration point and apply sealant around the edges to ensure a watertight seal.
- Lower the tile back into position, ensuring the hook protrudes through the gap without damaging the tile.
- Attach the Clamping Block (length 50mm) to the hook and secure the PV module rail, tightening all bolts to the specified torque.
- Perform a water spray test over the installed hook area to verify no leaks before proceeding with module installation.
COMMON ERRORS
| ✕ WRONG | CONSEQUENCE | ✓ CORRECT |
|---|---|---|
| Not using the Waterproof Gasket at the hook penetration point | Water can seep through the penetration hole, causing leaks and potential structural damage over time. | Always install the EPDM Waterproof Gasket and apply sealant to create a three-layer waterproof barrier. |
| Over-tightening the hook fixing bolts, causing tile cracking | Cracked tiles allow water ingress and weaken the roof structure, compromising the PV system's integrity. | Use the specified torque and avoid excessive force; if the tile is brittle, use a wider washer to distribute load. |
MAINTENANCE
Inspect the waterproof gaskets and sealant around each hook at each seasonal check, and reapply sealant if any cracks or gaps are found. Verify that the hook height adjustment remains secure and that no corrosion has developed on stainless steel parts.
REFERENCED STANDARDS
Technical Basis and Reference Standards
Design standard for photovoltaic power stations (including roof load requirements)
PV System Testing ProceduresDesign specification for PV support structures
Technical Code for Roof EngineeringBuilding structure load code (wind load/snow load)
Anti-corrosion of Highway Bridge Steel StructuresTechnical conditions for hot-dip galvanized coatings
SUPPLIER CAPABILITY
Quality, Delivery & Customization
Quality Control
- ✓MTC material certificates with every batch
- ✓Key parts sampled for hardness/salt spray/torque coefficient
- ✓100% inspection or AQL sampling before shipment
Delivery
- ✓Standard parts made to order: 7-15 days
- ✓Custom parts: 25-45 days
- ✓FOB/CIF/DDP supported
Customization
- ✓Drawing review and material matching
- ✓Non-standard sizes/heads/threads
- ✓Small-batch prototyping supported
Certification
- ✓Material certificates (MTC)
- ✓Spectrographic analysis reports
- ✓Salt spray test reports (on request)
MOQ: No MOQ for standard parts; custom parts assessed by process complexity
FAQ
Frequently Asked Questions
RELATED READING
Keep Reading & Next Step
BEYOND TECHNICAL SPECS
Finding the right factory, controlling quality, delivering on time — that's the real challenge. We cover fasteners, rubber, plastics, industrial textiles. One team, end to end.
SEE CAPABILITIES →